Keeping software simple

Git quickstart

What is git?
Git is a version control system, which means it's used to store and record changes to files – in particular computer software files.
How does it work?
Git stores each set of changes you make to files and folders as a series as separate things. These change set are called "commits" in git. Once a commit has been created it is immutable which means that it cannot be changed. This is what makes git so good at reliably backing up changes and means that you can use it to go back in time and see what your files used to be like before you made the changes.
What is a repo?
A "repo", short for "repository" is like a project that scopes a set of folders, files and their corresponding commits. All commits in git belong to a repo, so you need to create a repo if you want to use git.
Is git distributed (i.e. internet-based)?
Not inherently, no. Git is a tool that runs locally on a computer. However, git does know how to synchronise commits between two repos over the internet, and that means that different gits can talk to each other. This is very useful for storing your projects in the cloud. It also means there is an effective way for many people to work on the same project. Each person can have their own local git instance, and also synchronise with a central version in the cloud.
What is GitHub?
GitHub is an instance of git running on the cloud that anyone can use to store their repos. In this way of working, there are usually two instances of git: one on your computer and the other being GitHub. You would save your commits locally on your computer, and then periodically "push" the commits to GitHub as a backup.
GitHub is not the only cloud-based git instance available. Other big ones include Bitbucketopen_in_new and GitLabopen_in_new. Because git is open source anyone can set up a cloud-based service like GitHub. You can even create your own private one if you want.
The rest of this article assumes we're using GitHub but if you are using another service the instructions should work just as well.
Setting up git and GitHub
- Check if you already have it by running
git -vfrom your terminal. If you do, and assuming you are fairly up to date, skip step 2. - Download the latest git from hereopen_in_new and install it.
- Depending on what operating system you are on, make sure that git is in your path so that running
gitfrom the terminal works properly. Make sure you read the readme file or documentation that came with the installer. Once you can rungit -vsuccessfully you are done. - It's a good idea at this stage to set up your name and email address as this will be attached to all the commits you make. Read this pageopen_in_new for instructions on how to do that.
- If you haven't already done so, set yourself up with a GitHub account hereopen_in_new.
- Optional: it might be useful to set up an SSH key so that you don't need to keep typing your GitHub password every time you push commits. This is moderately involved so you can skip to start with until you're comfortable with git. The instructions are hereopen_in_new.
Creating a new git repo
This assumes you have created some files locally that you want to manage in git, but haven't created a repo yet. This won't work if you have cloned a repo from someone else's git account because in that case a repo will already exist locally.
Open a terminal inside your project folder (at the root of all the files you want to put in the repo) and run:
git init
That's all that's required to create a repo. What this does is create some hidden files in your folder, in a special folder called .git. This means that you can rename or even move your project folder to somewhere and the repo should go with it. Just don't delete the special .git folder or you'll delete the repo.

Making changes
A new repo has no commits which means there is nothing in it yet.
Once you have created some files in your project folder, you can commit them to the repo.
This is always a two step process:
- Add the files to a "staging" area so that they are ready to be committed.
- Run the commit command.
Staging added or edited files
You can add files to the staging area using the git add
command, which accepts full file specifications or wildcards.
e.g. git add README.md
will stage the README.md file and git add *.md
will stage all files with a .md extension.git add .
is especially useful as it recursively stages everything inside the current folder.
Note that even though the command is called add, it's not just for newly created files, it's for any changes.
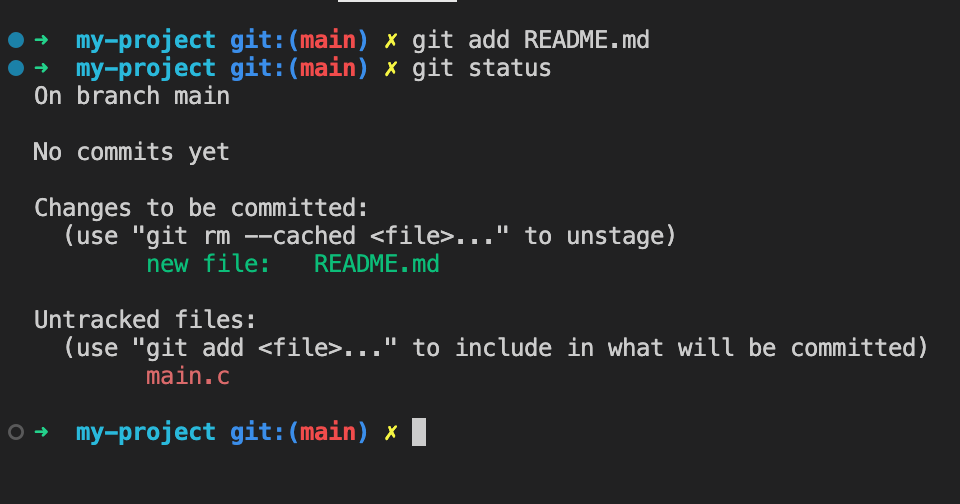
Checking what's staged
Run git status
to see what files you have staged (these should appear in green) and also what files have modified but are not yet staged (these should appear in red).
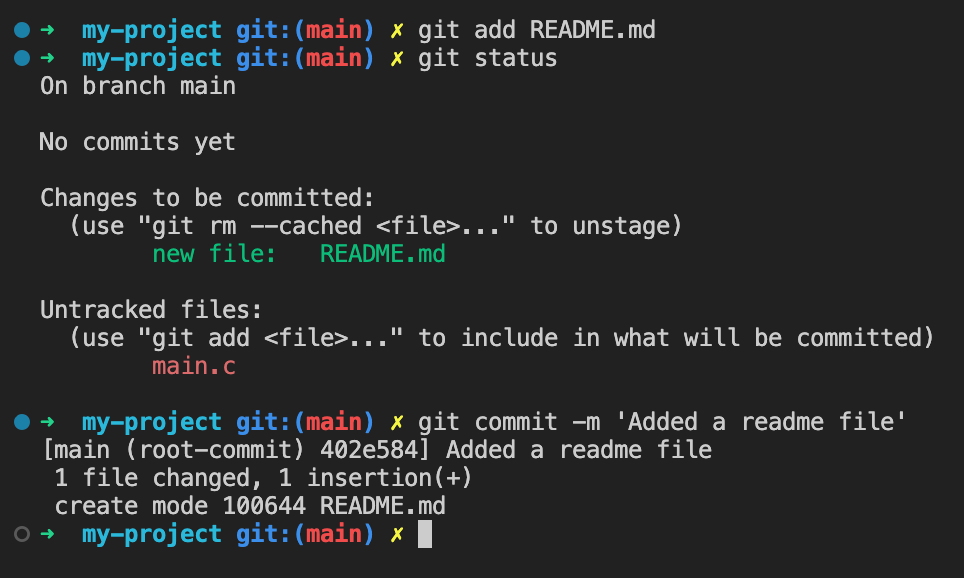
Committing
Once you are happy with the files that are staged, you can make a commit:
git commit -m 'Description of your commit'
The text after -m is called the commit comment, and it's good practice to write something useful here to jog your memory when you're looking back over your history.
If you forget to add the -m option git will pop open a text editor so you can enter a comment. If you haven't set up a different editor this will default to vim, which beginners often find very difficult to use, so it's a good idea to set up your preferred editor when you set up your email and name; see the setup guide above.
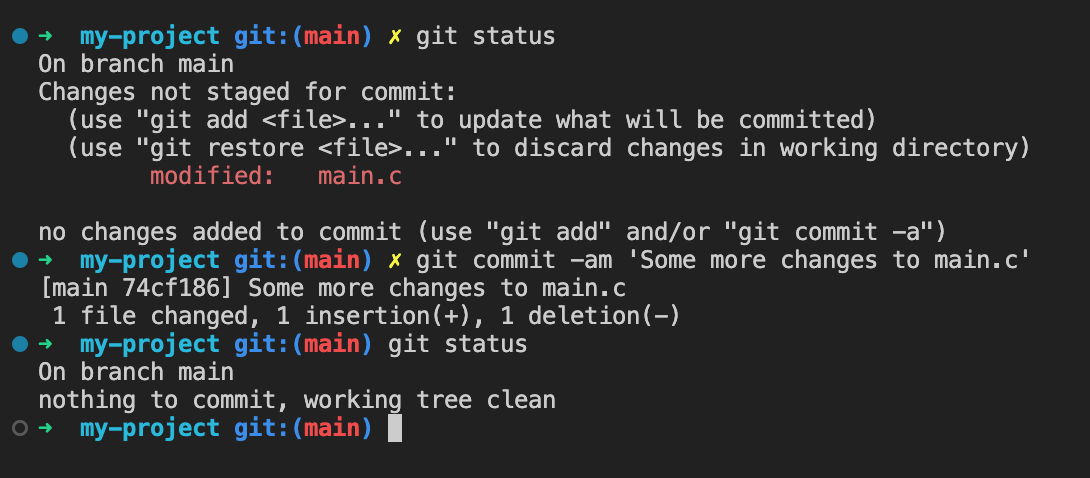
Checking the status after a commit
Run git status
again and if the commit worked okay you should now see no staged files left.
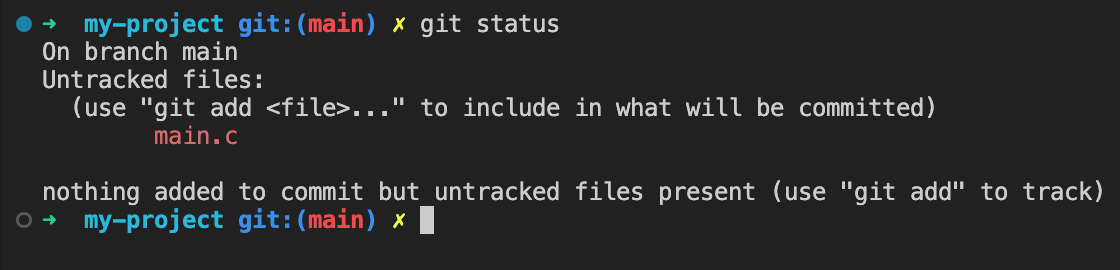
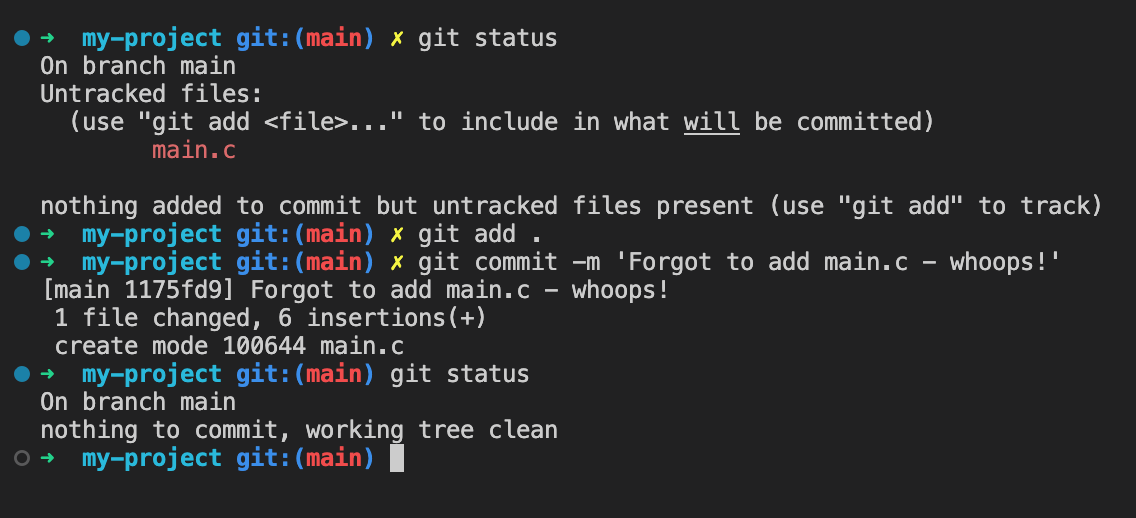
In this example I "forgot" to commit main.c. Although it's possible to correct the commit and redo it, it's much better to create a new commit with the missing file, for reasons which are too nuanced to go into now.
Quickly staging and committing at the same time
The two step stage / commit process can be very useful sometimes, but often you just want to do everything in once step. The -a switch to the commit command lets you do this.
git commit -am 'Description of your commit'
will stage all modified files and then commit with the given comment.
Note carefully that the -a switch only automatically staged modified files - it won't stage files that are brand new (so-called "untracked" files). If you are committing a file for the first time you need to add it explicitly with the git add
command.
Seeing recent commits
You can use git log
to see a report of recent commits to the repo.
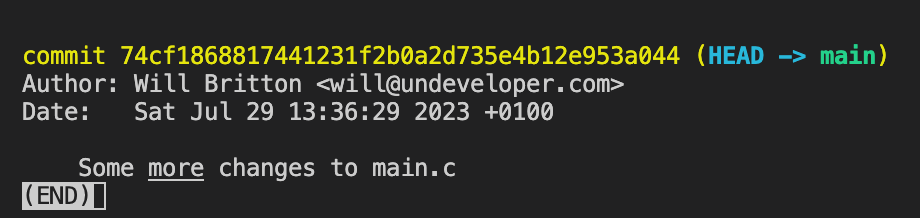
Running git log -n
where n is a number will show you only that many commits.
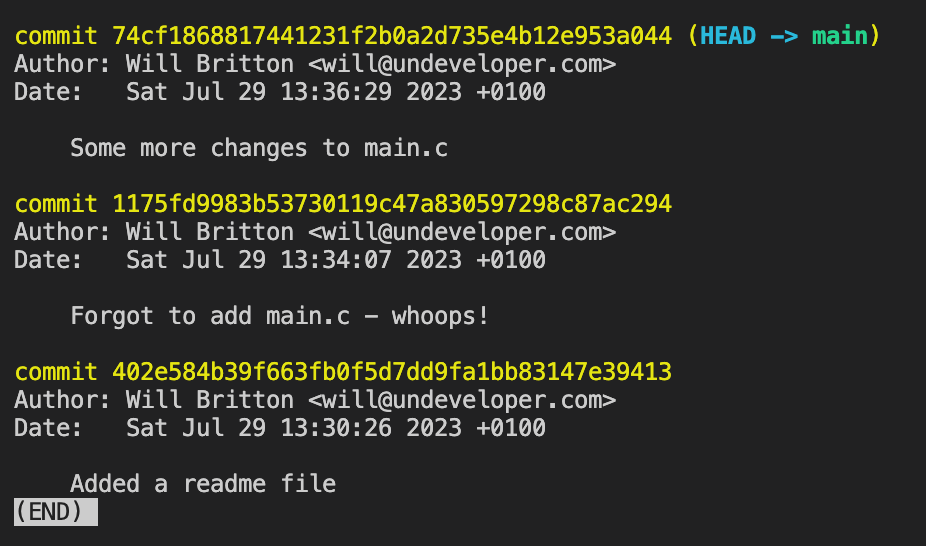
e.g. git log -1
will show you the last commit only.
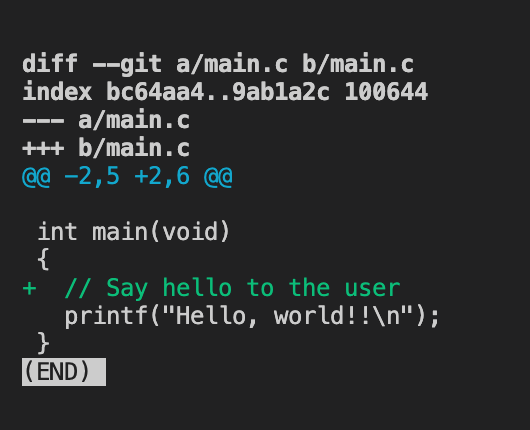
Seeing what files have changed
Before you stage files, you can see what has changed by running git diff
, which starts a new program that compares all the files in your working directory to those already in the repo.
Here I've added a comment to main.c and run git diff
. Git has a special syntax for describing file diffs which you might want to get familiar with.
You can set up git to use a different tool to display the diffs if you want to, e.g. your IDE probably has a file compare function you can use.
Without any options, git diff
shows the difference between your working folder and the latest commit in the repo, but if you want to see the difference between what's in your staging area and the repo you can run git diff --cached
instead. Play around if you don't quite see the distinction yet.
Pushing changes to GitHub
You can keep committing new changes to your local repo any time you want to. Each time you make a commit it's saved safely in the .git folder and your working folder can go back to "clean" again.
Whenever you like you can also "push" your changes to a cloud service like GitHub which will give you an extra backup of your project and also allow others to clone and collaborate.
How you do this depends on how you created the repo in the first place.
If you created the repo with git init
If you created your repo with git init
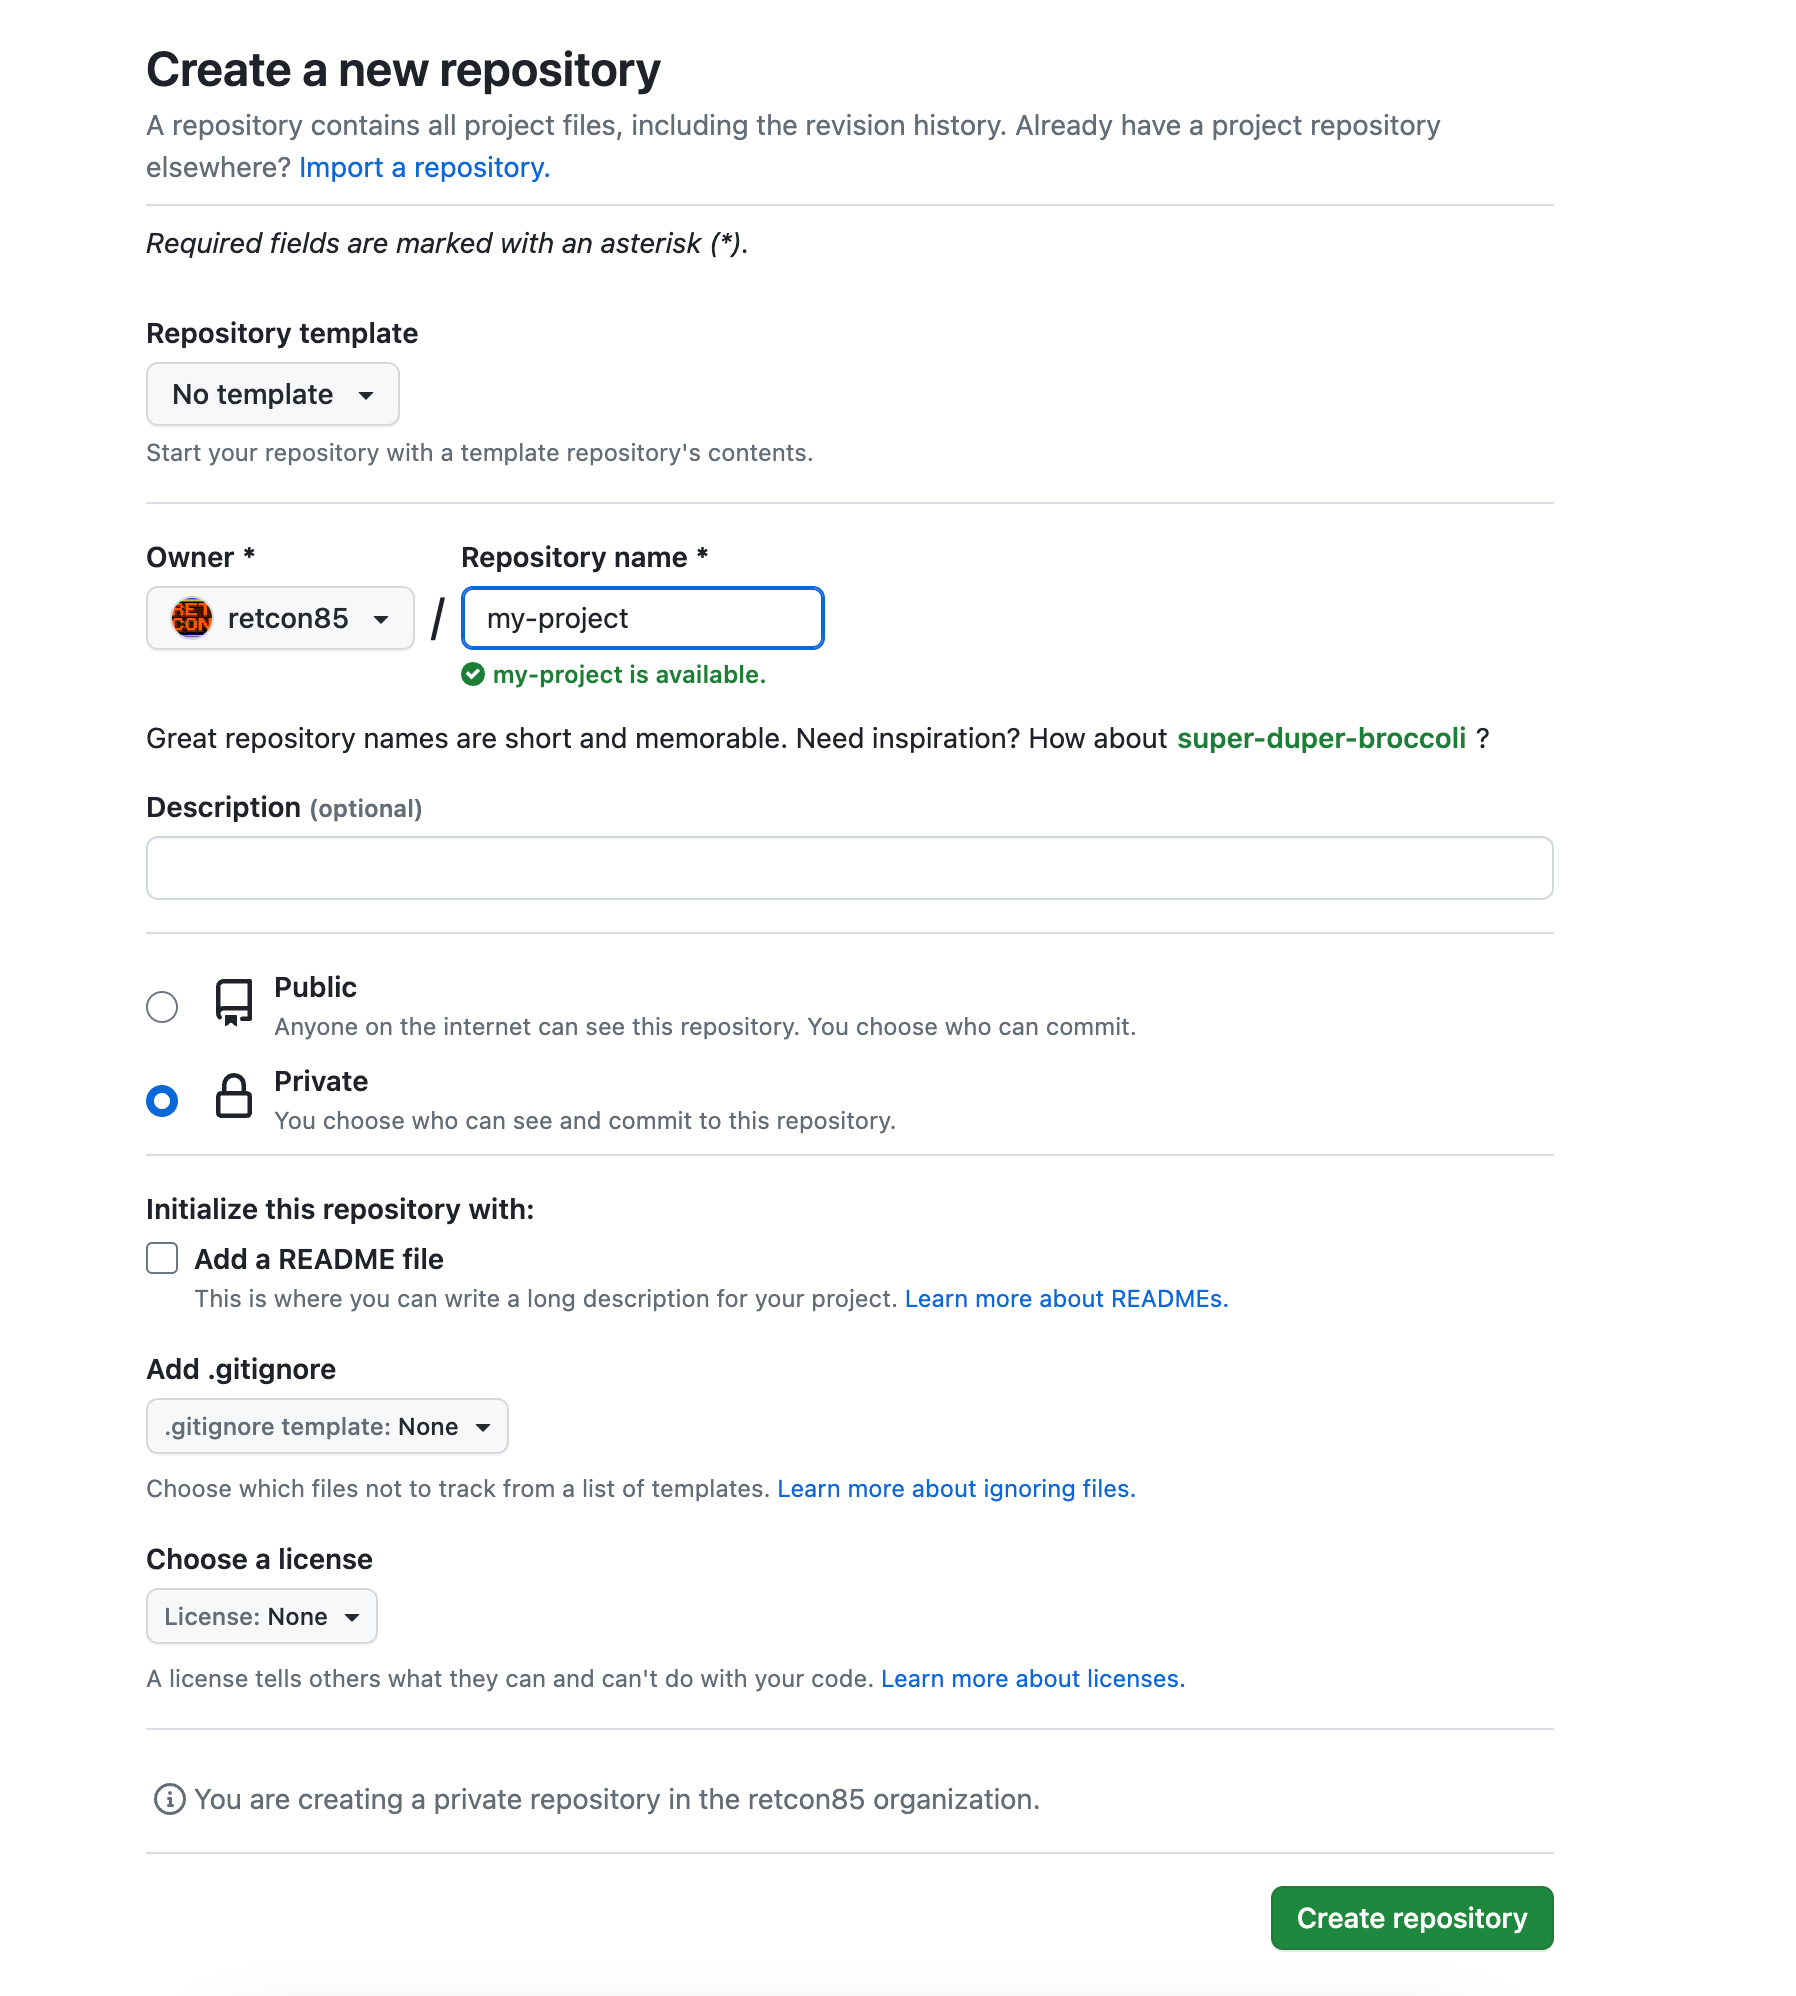
you will need to create a new repo in GitHub. It doesn't need to have the same name as your local repo but it might make sense. Creating a repo in GitHub is very quick, you just need to decide what to call it and also tell GitHub if it's public or private. Making it public means it's very easy for others to collaborate with you. Making it private is more involved - collaborators need to have their own GitHub account and you need to know their handle to give them access.
This repo is called the "remote".
Once you've created the remote, you need to connect your local repo with the remote repo.
You do this by grabbing the URL of the repo from GitHub and running the following command:
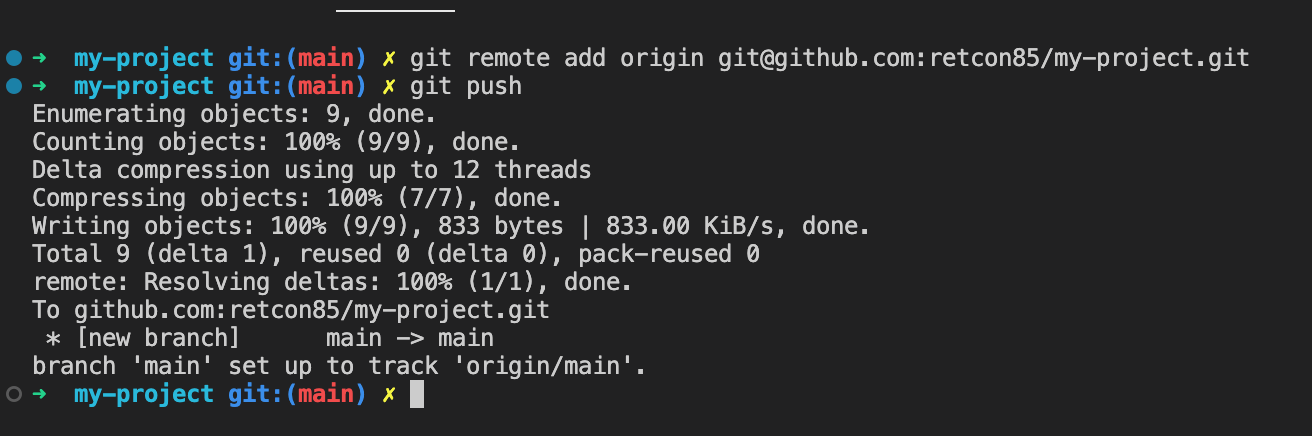
git remote add origin <url>

You have to be a bit careful here that the URL you grab is the right one. Git has two major modes of authenticating access to repos, HTTPS and SSH. If you use the HTTPS URL you will need to enter your GitHub username and password whenever you push changes. If you use the SSH URL you will need to set up an SSH key before you can push (see setup notes above). I recommend using HTTPS to start with - you can always change the URL later using the git remote set-url command.

Now that your local repo and your remote are connected, you can send all your local commits to the remote by running git push.
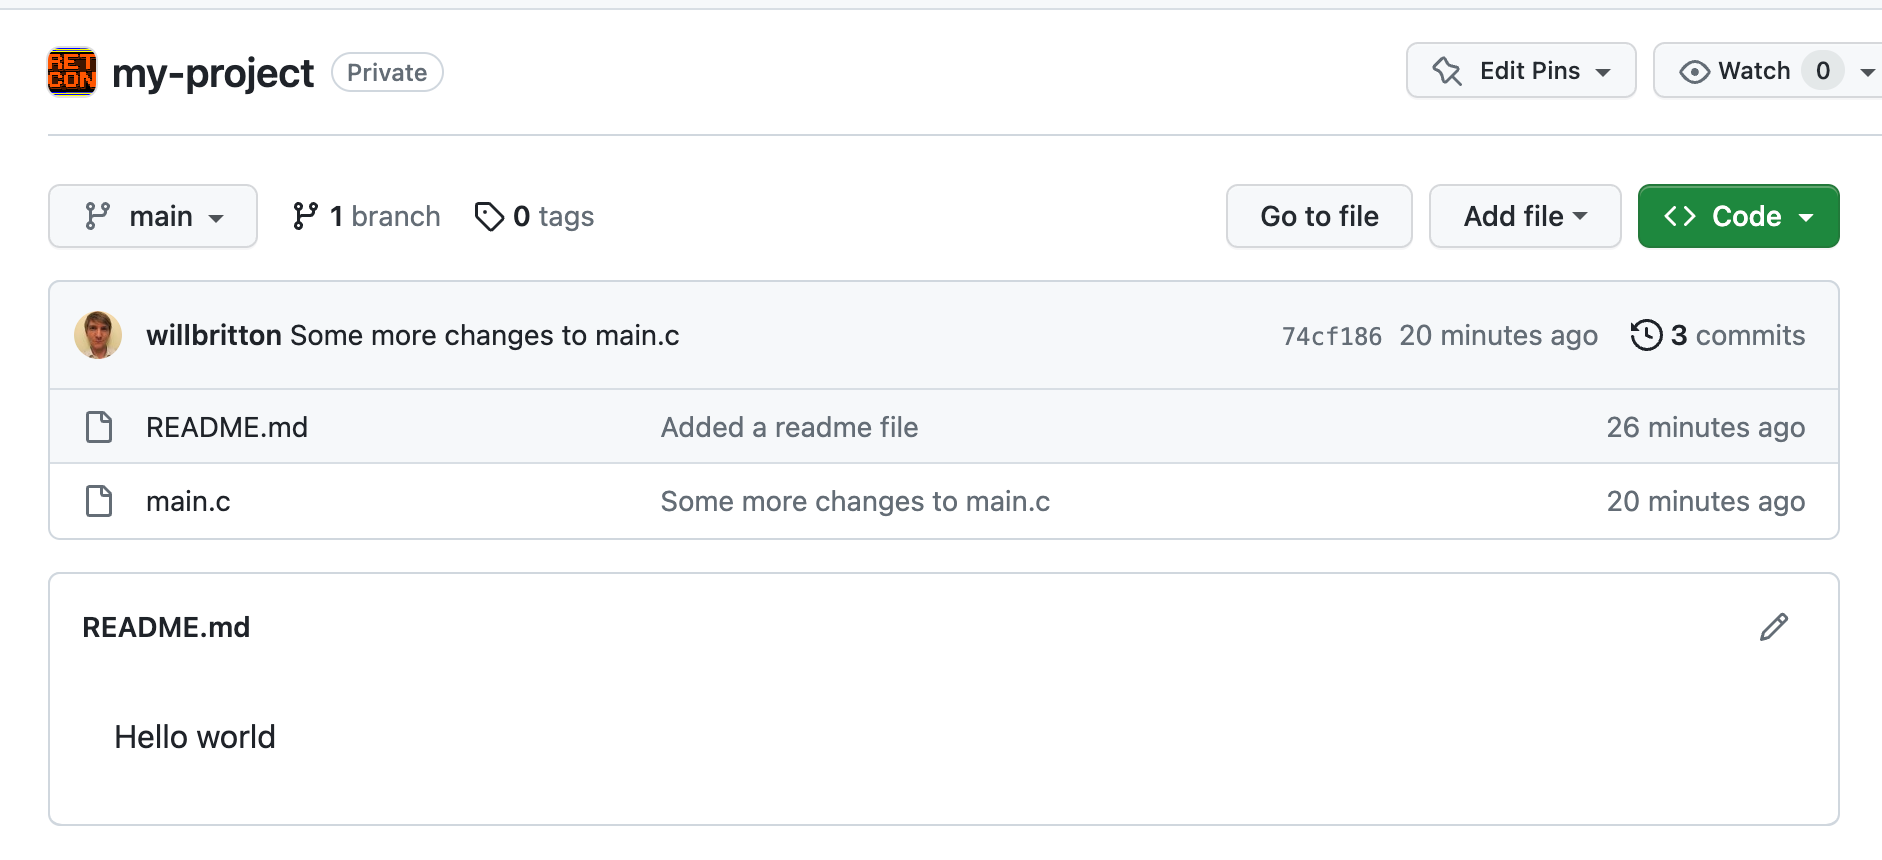
You should get a fairly long report and if you refresh your remote repo in your web browser you should see all your changes.
If you cloned your remote with git clone
If you already had a remote on GitHub and no repo at all on your local computer (common if you've been invited to collaborate on someone else's project), you will probably have run git clone
to download that repo from GitHub.
In this case, there is no need to run git remote add
because the two repos should already be connected.
You should be able to run git push
straight away to push your commits, but be careful! Two things may go wrong:
- You may not have permissions to push. For example, if you cloned someone else's repo from GitHub and they haven't added you to their team, you won't be able to overwrite their repo with your commits (obviously!)
- You may be confronted with "conflicts" and an invitation to "merge". This is what happens if more that two people (or yourself, working in two different places) try to make changes to the same repo. It's normal in team development, but it is quite a complex process so we won't cover it here.
Cloning someone else's repo from GitHub
Working with remote repos is possible simply by virtue of the commits being copied between them. When you run git push
it just compares your local repo with the remote, identifies any commits you have created which don't exist in the remote, and copies them to the remote. This means that after a push the log of commits in both repos should be the same.
Similarly, you can "pull" commits in the other direction - from remote to local repo - by exactly the same principle.
Running git clone <url>
will do exactly that - it will first initialise a new local repo on your computer with the same name as the remote, then copy all the commits from remote to local. That means the two repos will start off in sync.
If the author of the remote repo then makes some changes, the repos will be out of sync again.
Running the git pull
command in the cloned repo will do the reverse of git push
- it will check for any commits which exist in the remote which don't exist locally and copy them down.
Both git pull
and git push
will only work if both repos haven't changed independently, i.e. if the changes are only on one side or the other. If both repos have changed, something called a "conflict" arises and the independent changes must be "merged".
Branches
One last thing to note without getting into advanced subjects is that there's a level of organisation in git inside the repo level, called "branches". Branches are a very powerful way of organising different streams of work. For example, if you are collaborating on a big project with other people, one developer might work inside a branch for a feature while you work inside another branch on another feature, the plan being to merge both branches together at some point in the future.
Without going into detail on how branches work, one gotcha to mention is that in the last few years, the default git branch name has changed from master to main. If you create a new repo in GitHub it will be created with branch name main. If you create a new repo with the latest build of the git command line tool it should also get the branch name main. However if you have an older repo that was created a while back it might have the branch name master. Sometimes this can cause problems when connecting remotes up, if the branch names do not match.
For now, if you can see that both your local and remote repos are using the branch main you should be all set.
Advanced stuff
We've probably covered about 50% of what git can do, so there's loads more quite complicated functionality, but that's best dealt with on a topic-by-topic basis.
Once you've been using it for a while you will probably want to know how to recover old commits from history, as well as how to use branches to manage different work streams so maybe watch out for those topics when you feel you need to learn more.